Monday, October 3, 2011

Goodbye Driveway (Continued)

A little update for ya. Back in June we wrote about tearing up our old partial driveway that had become quite an eyesore for the front yard. As a reminder here's what it looked like before.


Then we had a ton of dirt delivered and it looked like this. 


Then we laid some seed and it looked like this.


Then it started to look like this!


And now about 3 months later, a little extra seeding here and there & countless watering sessions we've made it to here!


So it's a bit splotchy and definitely a totally different shade of green?!? But it certainly beats a random 6' x 12' slab of concrete. We're hoping that with a little more time, and come spring time, similar grass treatments to both the new and existing areas things will begin to blend. Only time will tell...

Friday, July 8, 2011

Belly Up To The Bar

9 months. That was how long we lived with this.


That was the work of our dear child Rufus...


Yup this gentleman got out of his crate (countless times) and left us with a ripped up barstool. The other one survived, but still the pair looked ridiculous. Yet, that didn't keep us from using them and simply throwing a coat over the eyesore when company was around.


And yes the chalkboard still says "Happy Father's Day"...

But the time had come to replace these barstools with something a little more durable and a little more us.  We wanted to veer a little more to the industrial side with this furniture piece and came across this steal at  Overstock.


Yup. $99.99 for 2 of them. Plus free shipping? Plus a promo code for 10% off? It was on. So $90 and four days later we had these.


A few hours in and we're diggin them. 


They're very simple and sleek. Plus they have this powdercoated finish to them that gives them a more modern feel. We also like the fact that they not nearly as heavy and bulky as the old barstools. This allows more room between the bar and our dining table.


You can sorta see in the last pic that our table is not centered under our hanging light fixture because of the big bulky stools. Now we can slide the table back and center it under the light....in another 9 months!

Monday, June 27, 2011

Obsessed: 8tracks

So first off, I saw stole this from Anna at Door Sixteen. However, for those who are not aware let me introduce to you, 8tracks. In short, you make a profile, upload a mix of songs & share with friends and strangers. Plus you get to discover some great music and mixes through the 268,824 (and counting) mixes. In length, it's addicting! I kicked things off with a festival heavy summer mix called "A Midwestern Summer." I hope you enjoy and when I get around to making another mixtape, I'l be sure to let ya know.


Sunday, June 26, 2011

Basil Infused Vodka

Oh snap, it's the weekend! We thought we'd try our hand at infusing some spirits this summer. First up, Basil Infused Vodka...Pretty easy stuff here.

Start by picking your ingredient which may be the toughest part. You can infuse most fruits, herbs and spices so there's plenty of room for creativity. We went with basil from our new little herb garden.


Chives, Parsley & 2 Basil plants for those keeping score at home.

We followed these guidelines. Just find a sealed container for your liquor. We went with an aqua blue mason jar. The directions suggest throwing the entire leaf and stem in. Pour in your liquor of choice, shake, and toss in the fridge. The directions also suggest shaking the container 3-5 times a day.  


After four days it was time to try this concoction and what better way to enjoy summer than with a basil vodka tonic. Taking a small sip of just the basil vodka I could taste the subtle basil flavor. 


There she is. We found the monogram "L" glass at a thrift store for 50 cents.

I decided to leave the basil in there through the weekend. So in all, we left the basil in the vodka for 7 days and think that'll be just enough to get some good infusion.

Monday, June 20, 2011

Goodbye Driveway

So a couple weeks months ago we started working on tearing out the random patch of old driveway located in our front yard.


First we rented a demo hammer from Lowe's and ripped up as much of the concrete as I could before having to return the thing (only rented it for 4 hours). There was still some large pieces of concrete remaining but I was able to dig out about 3-4 inches throughout. Then we had the topsoil delivered...


And then it sat there. For like weeks. Yup we're probably big hits with the neighbors right about now. We would chip away a wheelbarrow here a wheelbarrow there taking it to other areas of the yard, but with the amount of rain we had in April and May it dragged on waaaay too long. But finally we reached the point where everything was leveled with the existing soil. We took the extra time to slope the patch just slightly to allow for drainage and broke up any large chunks using a shovel and rake.

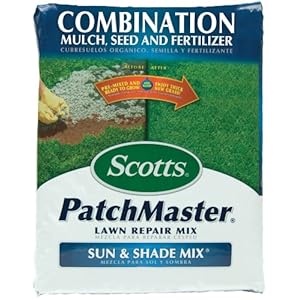
We originally thought we would have sod delivered and take an easy approach to this ordeal. However we were a little skeptical if sod would survive being laid on only a few inches of topsoil with bits of concrete still remaining underneath the topsoil. With a little googling here and here we found out that seeding (especially with fescue type seeds) might be our best bet. We came across Scott's Patchmaster Sun and Shade which was a combination of grass seed (mostly fescues), fertilizer and mulch.


We bought the 15 lbs. bag from Lowe's for around $19 on sale. After applying the entire bag to our topsoiled patch it looked like this:


We watered once a day for about 30-45 minutes on the days that it didn't rain and 8 days later we're lookin' like this!


Although we're definitely not out of the woods yet, we're very relived to see some progress and some green! Lucky for us and our water bill, we're supposed to see rain everyday this week so we'll be keeping a close eye on it...and of course keep you posted.

So have you had any luck growing grass in or on some interesting areas? Or have any horror stories about grass seeding or sod? We'd love to hear it!

Tuesday, June 14, 2011

We grew grass!

Ok not the psychoactive drug, but just the regular backyard grass. So how thrilling huh? An entire post dedicated to growing grass! But we were actually pretty pumped. Being that this is our first spring as homeowners, we've never had to grow grass before and our green thumb track record is not too hot so we were a little worried.


For those who are still reading this, let me explain. We had this area under our big maple that looked pretty awful:


These pics were taken prior to the paver walkway we made and documented about here. As you can see it was lookin a little rough. Plus with the surplus of rain this spring the whole area quickly became a mudfest. And why those really big pavers were there we have no idea? So after completing the paver walkway we knew this was the next target.


We ran to Lowe's and spent some time comparing grass seeds. Talk about options! For such a basic concept there are a million different types! Again something we never knew about until becoming homeowners. Anyways we found this Scott's EZ Seed to be the right stuff for the area. 

The EZ Seed was great because when you water it the seeds turn dark brown. When the seeds turn light brown they're ready for more H20. This is extremely nice for newbies like us because you'll never over or under water as long as you can follow these simple instructions (hence the name "EZ").

We blocked the area (to avoid any dog traffic) with some metal stakes and rabbit fencing. The stakes were given to us from a neighbor & the fencing was purchased at Lowe's for something like $20 for 50'. It was roughly about 10 days when we finally saw tiny grass seedlings begin to poke through the soil & man were we elated!

Unfortunately we didn't capture any early photos so we'll just cut to the before & after...So rewind 10 days and we were looking something like this before....


And now the after:


Now for good measure, a picture before the DIY paver walkway and new grass. Before:


And after:


It's a start right? Now we gotta get back to the front yard and DIY raised garden beds...


Saturday, June 11, 2011

Saturday, In The Yard

We got a little more work done today. This time we attacked the flower bed that runs along the outside of the fence and faces a fairly busy street. This is bad because when we moved in, it looked like this:


After a little work last fall we had it looking like this:


After today's work it looks like this!


Today we started by weeding the little buggers that had taken over this spring. After that we laid down some Miracle-Gro Weed Preventer & Plant Feed. Next we planted four Zebra Grass plants. 


We wanted something low maintenance that does well in the sun and won't catch a ton of debris/leaves. Because this side of the house faces a street with decent traffic we get a lot of wind and with that a lot leaves and even sometimes a little litter. Since we don't find empty Fritos bags or McDonald's cups too appealing we went with more grass like plants in hopes that less trash will get caught in our yard. In theory this makes sense to us but hopefully we haven't lost ya yet. We're gonna have to find a way to get the three existing droopy grasses to perk up a little, but we'll worry about that later.

We also dug up the rose bush that was on the corner of the fence and replaced it with a less thornier light green shrub which of course we can't remember the name of. Anyways we really like the bush and think that once we get around to staining the fence a little darker, all these green plants will "pop" even more. Speaking of "pop" we finished the day by laying down some black mulch to give the bed some pizzaz.

So let's go back to last fall when we moved in for the before...


And now for the after...


Now it's onto the other 128,974 areas of the yard that need help! Anyone out there conquering some landscaping challenges this spring/summer?